Sometimes, you just need perfectly melted chocolate, whether it’s for coating strawberries, drizzling over a cake, or mixing into a ganache. But if the temperature’s too high or there’s a bit of moisture nearby, the whole batch can go wrong. It either burns, seizes up, or turns grainy.
But with the help of the right approach, you can melt chocolate properly at home—smooth, silky, and ready to use. In this guide, we’ll walk through step-by-step techniques on how to melt chocolate without burning it by using everyday tools like a double boiler, microwave, or stovetop, so you can handle chocolate with confidence every time.
How Melting Chocolate Can Be Challenging
Melting chocolate sounds simple, but it takes more care than most people expect. It’s a blend of cocoa mass, cocoa butter, and sugar—each reacting differently to heat. When heated too quickly or unevenly, chocolate can scorch or become thick and clumpy. Even a single drop of water can cause it to seize, turning it from smooth to stiff in seconds. Getting it right means understanding what causes these issues so you can work around them, not against them.
Understanding Chocolate Composition
Chocolate isn’t just one ingredient—it’s a mix of several, and each type of chocolate behaves a bit differently when melted. Knowing the basics can help you choose the best chocolate for melting, depending on what you’re making.
Dark chocolate contains a high amount of cocoa mass, which gives it a deep, intense flavor. But it also makes it more sensitive to heat, so slow, gentle melting is the way to go to avoid burning.
Milk chocolate has added milk solids and more sugar, making it softer and sweeter. But those extra ingredients can cause it to burn faster, so it needs low, steady heat for the best result.
White chocolate doesn’t have cocoa mass—it’s made with cocoa butter, sugar, and milk solids. That gives it a creamy texture, but also makes it delicate. It’s easy to overheat or scorch, so careful attention is key.
Check out our blog: Everything You Need to Know About Cooking Chocolate
Essential Tips for Perfect Chocolate Melting
1. Choose the Best Chocolate for Melting
Not all chocolate melts the same. For smooth, glossy results, go with chocolate that’s made for melting, like couverture or baking bars. These chocolates have a higher cocoa butter content, which helps them melt more easily and evenly. Avoid regular chocolate chips, which are designed to hold their shape and can become lumpy or thick when melted.
Choose high-quality dark chocolate for bold flavor, milk chocolate for balanced sweetness, and white chocolate for its creamy finish—but remember, the smoother the chocolate, the more care it needs.
2. Preparing Your Chocolate Correctly
Even before the heat comes in, how you prepare your chocolate makes a big difference. Chop it into small, even pieces to help it melt evenly and avoid hot spots. Uneven chunks can leave you with a half-melted, overheated mess. And always double-check that your bowls, knives, and spatulas are dry—just a little water can cause the chocolate to seize and turn gritty.
If you’re using chocolate bars, shave them into flakes. Avoid chocolate chips if your goal is smooth melting—they’re meant to hold shape, not blend.
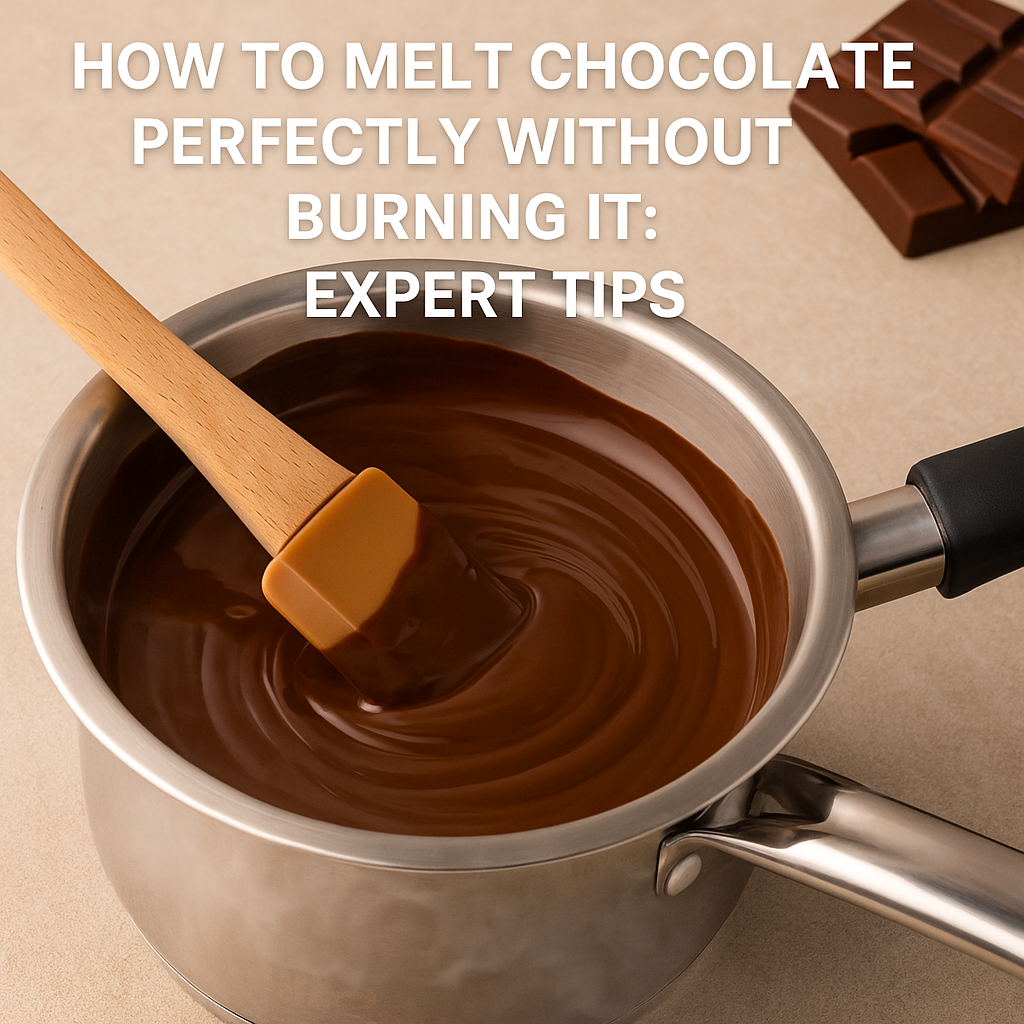
3. Double Boiler Method
This method is a favorite for a reason. It uses gentle steam to melt chocolate without direct heat, making it perfect for white or milk chocolate.
To start, fill a pot with about an inch of water and bring it to a gentle simmer. Place a heat-safe bowl on top—just make sure it doesn’t touch the water. Add your chopped chocolate and stir gently with a silicone spatula. The steam will warm the bowl and melt the chocolate gradually.
This approach gives you more control and reduces the chances of overheating. It’s especially helpful when working with delicate or expensive chocolate.
4. Microwave Method
Melting chocolate in the microwave is quick and convenient—but it’s also easy to overdo. The key is low power and short intervals.
Use a microwave-safe bowl and reduce the power to 50%. Heat the chocolate in 15 to 20-second bursts, stirring between each one. Stop when the chocolate is mostly melted—the remaining heat will finish the job.
It’s a great method when you’re in a hurry, but keep a close eye on the texture. Dark chocolate handles the heat a little better, but milk and white chocolate need extra care.
5. Using Butter or Oil for a Smooth Consistency
Sometimes melted chocolate can feel too thick to drizzle or dip. Adding a little butter or oil helps improve its texture. It keeps the chocolate flowing smoothly and adds a slight gloss.
To melt chocolate with butter, use about one tablespoon per cup of chocolate. For oil, go with something neutral like vegetable or coconut oil. It’s a good trick when you’re prepping chocolate for cake coatings or dipping fruit.
Interesting Fact
“Chocolate callets melt faster because their small, uniform shape increases surface area, allowing heat to distribute evenly. This prevents hot spots and ensures a smooth, consistent melt.”
How to Temper Chocolate for a Smooth, Shiny Finish
Tempering gives chocolate that glossy finish and satisfying snap—ideal for candy, coatings, or molded shapes. It’s more technical but worth learning if you’re after a polished result.
Start by melting two-thirds of your chocolate using the double boiler method. Once melted, remove it from the heat and stir in the remaining third. This helps bring the temperature down slowly and stabilizes the cocoa butter.
Here’s the target temperature range:
- Dark chocolate: 88–90°F (31–32°C)
- Milk chocolate: 86–88°F (30–31°C)
- White chocolate: 80–82°F (27–28°C)
Tempered chocolate holds its shape better, sets quickly, and gives a professional finish to your creations.
Interesting Fact
“Chocolate contains six types of cocoa butter crystals, each melting at different temperatures. The perfect melt happens at about 33–35°C (91–95°F), where the chocolate feels smooth and snaps nicely. This is why precise temperature control is key to perfect chocolate!”
Specialized Techniques: Melting Chocolate for Different Uses
Melting Chocolate for Strawberries
Choose dark or milk chocolate with a splash of coconut oil for a smooth dip. Make sure the strawberries are completely dry, and let them set on parchment for a clean finish.
Melting Chocolate for Cake Coating
Use high-cocoa butter chocolate for smooth pouring. Add a touch of vegetable oil for a glossy, even coating that spreads easily over cakes or brownies.
Melting Chocolate for Candy Making
Tempered chocolate is the best choice for candies and molds. Silicone molds help with clean release, and tapping out air bubbles makes the surface smoother.
Common Chocolate Melting Mistakes and How to Avoid Them
- Burning chocolate: Always melt over low heat and stir regularly.
- Seizing: Keep moisture far away—no wet spoons or bowls.
- Overheating: Remove from heat while a few pieces are still unmelted. Residual heat will take care of the rest.
- Poor-quality chocolate: Use baking bars or couverture—not low-end chips.
How to Fix Seized Chocolate
If your chocolate seizes and turns thick, there’s still a chance to save it. Add a teaspoon of neutral oil or melted butter and stir slowly. It may not be perfect for everything, but it’s still usable for sauces or fillings. Avoid water, as adding more will only make it worse.
Conclusion
Melting chocolate might seem intimidating at first, but once you get the hang of it, it becomes second nature. Whether you’re prepping a drizzle for cake, dipping fruit, or making a glossy coating, knowing the right techniques ensures you get smooth, perfectly melted chocolate every time.
Before you melt your next batch, make sure your chocolate has been stored the right way. Learn how to keep it fresh and full of flavour here.
Looking for premium chocolate made for melting? Explore EFA’s finest chocolate range and upgrade your next dessert project with better texture, flavour, and finish.
FAQs
1. How do you melt chocolate and keep it creamy?
To keep melted chocolate smooth and creamy, low heat is key. Whether you’re using a double boiler or microwave, avoid rushing the process. Stir gently and continuously as it melts to help the cocoa butter distribute evenly. If you’re working with chocolate callets, which are small, uniform pieces made for easy melting—they’re especially helpful in maintaining a silky texture. Callets melt faster and more evenly than chopped chocolate bars, so they’re a great choice when consistency matters.
2. What is the best way to melt chocolate?
There isn’t one single best method—it depends on what you’re making and the type of chocolate you’re using. That said, the double boiler method is widely considered the most reliable. It uses gentle, indirect heat, which reduces the risk of burning or seizing. If you’re short on time, the microwave method also works well—just go low and slow. Chocolate callets are a good option no matter the method, as their shape encourages even melting and reduces the chance of overheating.
3. Should I add butter to melting chocolate?
You can, especially if you’re looking for a softer, glossier finish. Adding a small amount of unsalted butter helps loosen the texture, which is great for dipping or drizzling. Just make sure the butter is at room temperature and add it once the chocolate is partially melted. It’s best to avoid adding too much—about a tablespoon per cup of chocolate is enough.
4. What should you not do when melting chocolate?
Avoid high heat and don’t let any water come into contact with the chocolate—both can ruin it. Even a single drop of water can cause chocolate to seize and turn grainy. You also don’t want to walk away while it’s melting. Chocolate can go from smooth to scorched fast. Lastly, skip chocolate chips meant for baking unless the recipe calls for them specifically—they often have stabilizers that make them resistant to melting. Instead, use couverture or callet-style chocolate for better results.
5. How to make melted chocolate shiny?
For that glossy, polished finish, tempering is the technique to master. This involves heating, cooling, and reheating chocolate to specific temperatures that help stabilize the cocoa butter. When done correctly, tempered chocolate sets with a beautiful shine and a firm snap. You can also add a touch of neutral oil or cocoa butter while melting for a subtle sheen, especially if you’re skipping tempering.